Sometimes you don’t pick a candle. You pick a decision.
Across the 4 screenshots you shared (M30, M15, M5, M1), the blue-arrow candle on M30 is not “a pattern.” It’s a regime checkpoint: price probes below a key zone, fails to stay there, then reclaims and closes above it.
This article breaks down why that single M30 candle matters in a proper multi-timeframe (MTF) framework—and how a Darren-style level trader would read it, set alerts, and avoid the most common traps.
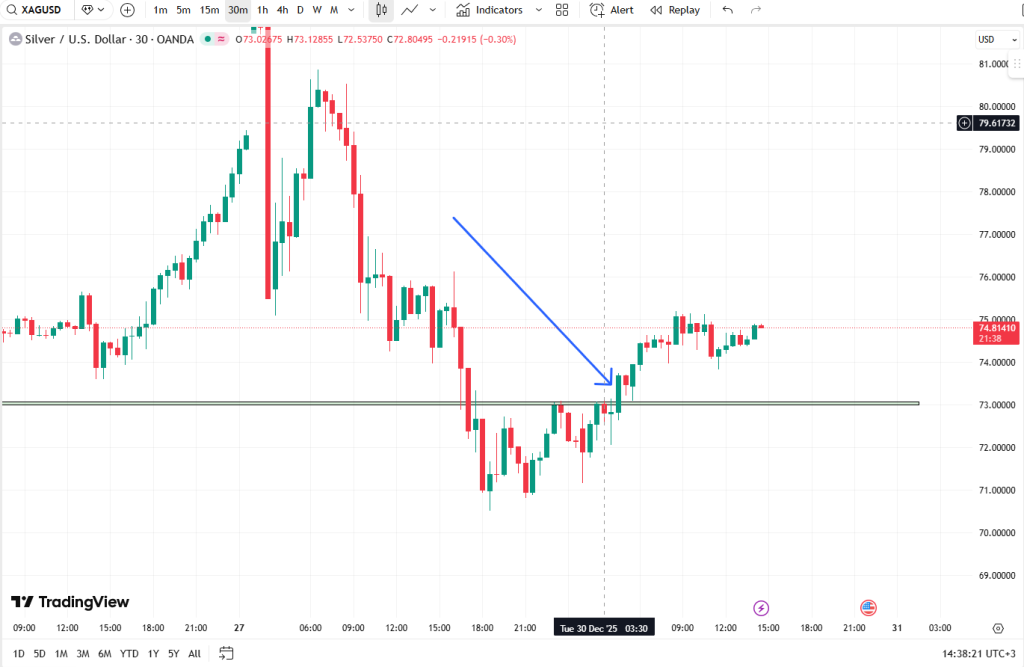
1) The Big Picture (M30): The Candle That Proves Acceptance
The chart shows a sharp selloff (high 80s down into the low 70s), followed by a recovery into a key area around 73 (your green zone + black line).
The M30 “decision candle” is valuable because it does three things
- Sweeps below the zone (downside probe / wick)
- Fails to hold below (rejection)
- Closes back above the zone (reclaim + acceptance)
That close is the point. Not the wick. Not the vibe. The close is where higher-timeframe participants “vote.”
If price can stay accepted above that zone, the market has a real reason to transition from “sell rallies” to “buy dips.” If it loses the zone again, the upside thesis collapses quickly.
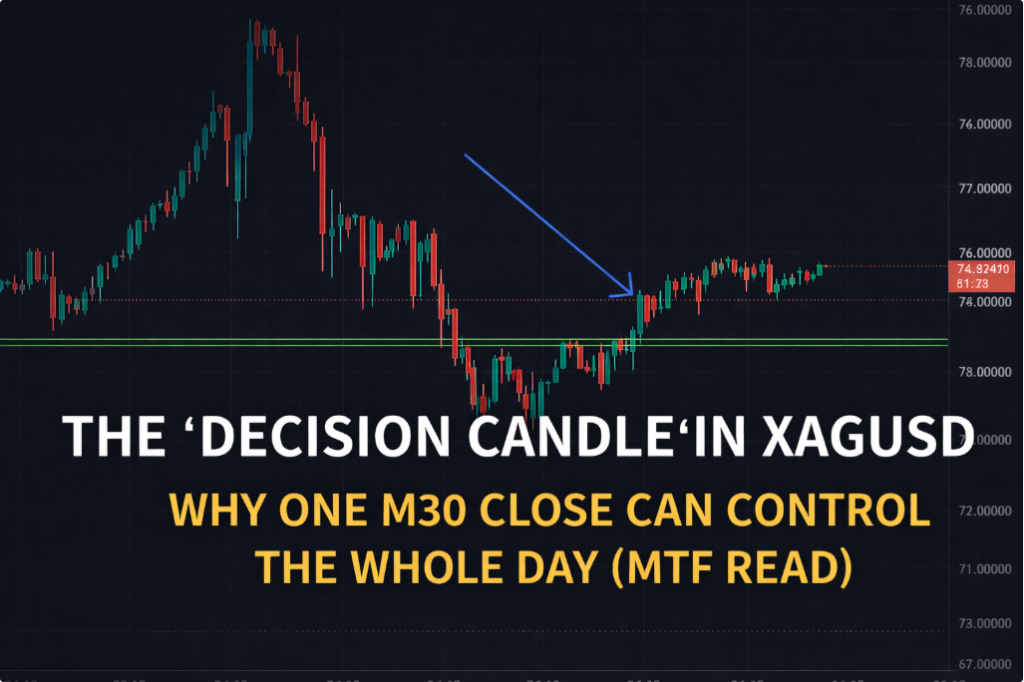
[IMAGE 1 — M30: Decision candle / reclaim close above the level]
Caption: “M30 reclaim: downside probe fails, buyers win the close.”
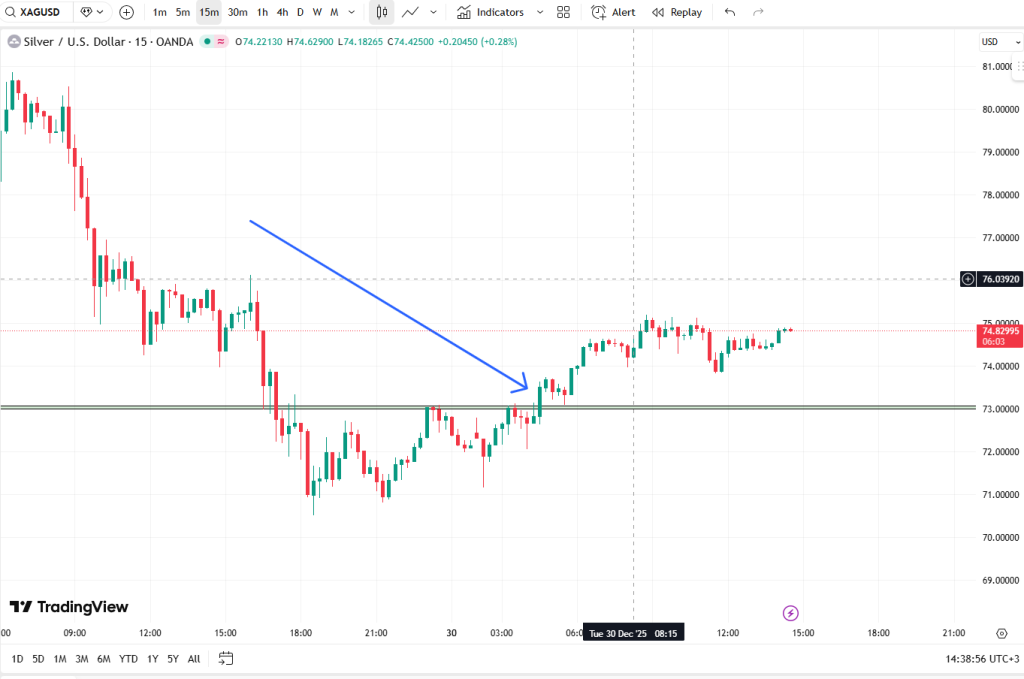
2) The Confirmation Layer (M15): From Reclaim to Hold
M30 gives you bias. M15 answers the next question: “Is the reclaim real—or just a spike?”
On M15, after the reclaim, you typically want to see
- Price holding above the zone
- Follow-through candles that don’t instantly collapse back into the level
- Early signs of a support/resistance flip (S/R flip)
Your M15 screenshot supports the idea that the reclaim is not random noise. It’s moving toward acceptance behavior: price living above the level rather than merely touching it.
[IMAGE 2 — M15: Acceptance/hold behavior above the zone]
Caption: “M15 confirms: reclaim turns into a hold.”
3) The Tradable Structure (M5): Break–Hold–Go
M5 is where the story becomes tradable.
A classic post-reclaim sequence on M5 looks like this
- Break above the zone
- Hold above the zone
- Small pullback / “sit” on the level
- Continuation push
This is the key MTF idea: M30 sets the direction. M5 builds the setup.
If M5 shows “break–hold–go,” the higher-timeframe reclaim has a real execution pathway. Without M5 structure, you’re often just gambling on the next candle.
[IMAGE 3 — M5: Break–hold–go setup built on the reclaimed level]
Caption: “M5 turns the bias into a setup: break, hold, continuation.”

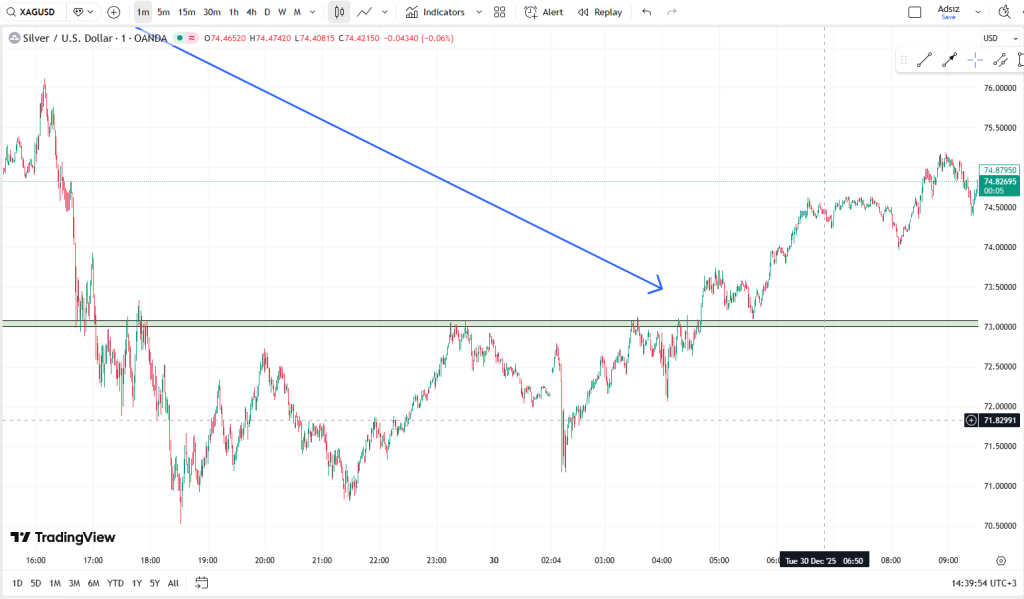
4) The Trigger Layer (M1): Compression → Expansion
M1 shows the micro-mechanics inside the M30 decision.
Around the level you often see
- Compression (chop/tight range near the zone)
- Downside pokes that fail (absorption)
- Expansion (momentum release once acceptance is clear)
That’s why these reclaims can move fast: trapped shorts + new buyers combine into a clean push once the market proves it can hold above the zone.
[IMAGE 4 — M1: Compression near the zone, then momentum expansion]
Caption: “M1 trigger: compression at the level, then expansion after acceptance.”
Why This M30 Candle Was Worth Selecting (The Real Reason)
You likely selected that candle because it’s not “pretty.” It’s useful
- It’s the first higher-timeframe close that reclaims the zone
- It contains a “failed break” signature (probe below → failure → close above)
- It connects perfectly in MTF logic:
- M30: bias shift candidate
- M15: acceptance/hold
- M5: tradable structure
- M1: trigger timing
- It defines your risk boundary:
- If price re-accepts below the zone, the bullish premise is invalid
In one line: you didn’t pick a candle—you picked the moment the market changed its mind.
How Darren Would Read This (Level Trader Logic)
A Darren-style read is brutally simple
- “Look left. Has this level mattered before?”
- “M30/H1 sets bias. M5 sets the setup. M1 is only the trigger.”
- “If it sweeps below and closes above, that’s a failed break / trap signature.”
- “I don’t trade candles. I trade acceptance above a level.”
In this scene, the M30 candle is a bias pivot because it proves:
buyers can hold a close above the zone.
Where Darren Would Place Alerts (Two-Gate System)
Darren doesn’t place “one alert.” He places a two-gate framework, because alerts are for attention—not entries.
1) Upper Alert (Reclaim/Hold Watch)
Place it slightly above the top of the zone (buffer for spread/noise).
Purpose: “Price is back above the zone—go to M5/M1 and check structure.”
2) Lower Alert (Failure/Invalidation Watch)
Place it slightly below the bottom of the zone.
Purpose: “If we re-accept below, the long thesis is dead—reassess.”
3) The Most Darren-Style Option: Bar-Close Alert
If your platform supports it (e.g., TradingView):
Set the condition to trigger on M30 bar close relative to the level.
Because for him: the close is the decision point.
Checklist: 6 Conditions Before Taking the Trade
Use this as a quick pre-trade filter
- M30 candle closes above the zone (reclaim)
- Next candles show no immediate collapse back into the zone
- M15 confirms acceptance (holding above / S/R flip behavior)
- M5 forms a clean break–hold–go (or pullback entry structure)
- M1 shows compression then expansion (trigger), not random chop
- Invalidation is clear: “If we re-accept below the zone, I’m wrong.”
If 2–3 of these are missing, you’re not trading a setup—you’re trading hope.
Common Traps: 5 Mistakes Traders Make Here
- Entering on the wick, not the close
- Treating a level as a single line, not a zone
- Ignoring M5 structure and buying “because M30 looks bullish”
- Moving invalidation levels to avoid being wrong
- Setting alerts on the exact line and getting spammed into bad decisions
This is a level trade, not a candle trade. Don’t worship the candle. Use it.
Alert Template (TradingView-Style Logic)
A simple alert plan
- Alert A: “Price breaks above zone top” → go to M5/M1
- Alert B: “Price breaks below zone bottom” → thesis invalid / reassess
- Optional: “M30 close above/below level” (bar-close alert)
The purpose is consistent: alerts call you to the screen.
They do not tell you to click Buy/Sell.
Final Take
That M30 candle matters because it’s the first higher-timeframe proof of acceptance above the zone—after a failed push below it. M15 confirms the hold, M5 builds a tradable structure, and M1 delivers timing.
One candle. Four timeframes. One decision.